INTRO
Nocode tools have transformed how we build websites empowering creators to craft professional sites without technical expertise just like the website that you see now. Framer stands out with its intuitive interface and robust features like animations CMS and SEO tools making it an excellent choice for portfolios that need to impress. For my portfolio I wanted a site to showcase my UI/UX and nocode skills while being easy to update. Framer met these needs perfectly offering a smooth workflow from design to launch.
CHOOSING FRAMER WHY IT WORKS FOR PORTFOLIO
I evaluated several nocode platforms based on design control usability and customization and Framer won me over for several reasons. Its Figmalike tools let me create precise layouts directly in the platform while adding animations and hover effects was a breeze enhancing user engagement. I could manage projects and blog posts efficiently with reusable templates thanks to CMS integration and builtin tools like meta tags and sitemaps made optimization simple. Additionally Framer's hosting ensures fast load times which is crucial for UX and SEO.
THE DESIGN PROCESS PLANNING IT OUT
Before jumping into Framer I planned my portfolio carefully by setting clear goals and sketching a basic layout. I needed a site to display my work share my story and include a contact form with a blog section as a bonus for SEO and I sketched pages like Home About Projects Blog and Contact with each serving a specific purpose. For the visual style I opted for a minimalist design with clean lines bold fonts and a personal color scheme and while I started in Figma Framer's design tools were so good I switched to designing there.


HOW I BUILD MY PORTFOLIO STEP BY STEP
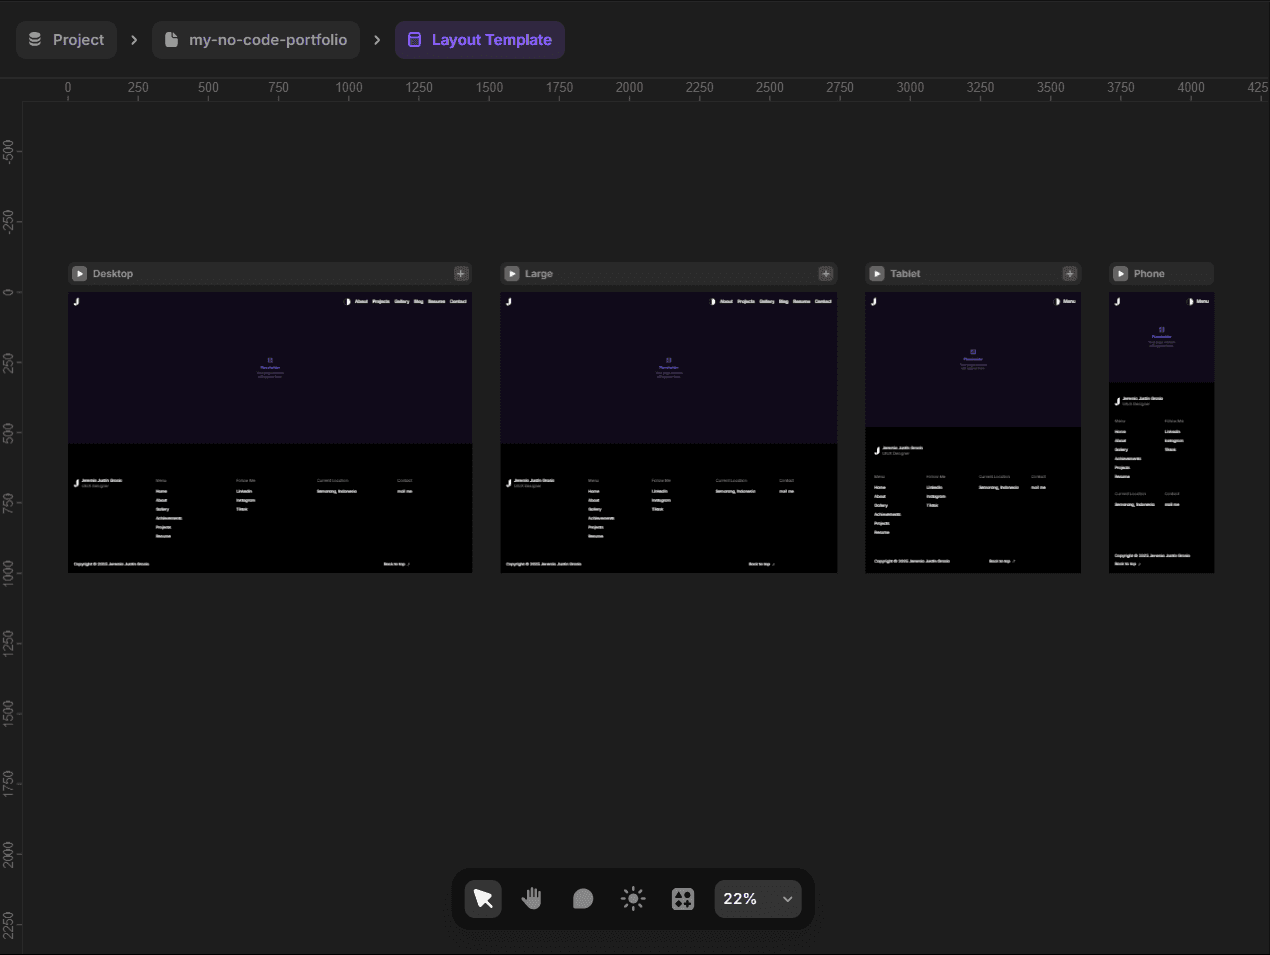
I brought my portfolio to life in Framer by starting with a blank template for full creative control and creating the design system first like colors to define the light and dark mode, typography structure layout template that contain navbar and footer for every breakpoint 1440px (Desktop) 1200px (Laptop), 768px (Tablet/iPad) and 375px (Phone). My reason for choosing these sizes was to start from the smallest size in every device to ensure responsiveness would be effective and every reusable component was already structured.
HOW I BUILD MY PORTFOLIO STEP BY STEP
I brought my portfolio to life in Framer by starting with a blank template for full creative control and creating the design system first like colors to define the light and dark mode, typography structure layout template that contain navbar and footer for every breakpoint 1440px (Desktop) 1200px (Laptop), 768px (Tablet/iPad) and 375px (Phone). My reason for choosing these sizes was to start from the smallest size in every device to ensure responsiveness would be effective and every reusable component was already structured.


ANALYZE OTHER DESINGER WORK
After setting up my design system in Framer I began by analyzing other designers' work in the Framer template menu where I learned a lot about creating effective animations structures and CMS Content Management System. This process of analyzing helped me gain insights and inspired me with ideas for layouting typography colors and more.
FULLY AUTO LAYOUT/STACK
For all my pages I use stack in every variable or as you might know it auto layout which Framer calls stack and I consider this the most important aspect of design. With a fully stacked layout I can manage and maintain my design effortlessly across every breakpoint from desktop to phone.
TYPOGRAPHY AND COLOR CONTRAST
I test my design system setup by applying it while designing to determine whether my typography is too small or too large and to assess the contrast between dark and light modes.
TYPOGRAPHY AND COLOR CONTRAST
I test my design system setup by applying it while designing to determine whether my typography is too small or too large and to assess the contrast between dark and light modes.
TYPOGRAPHY AND COLOR CONTRAST
I test my design system setup by applying it while designing to determine whether my typography is too small or too large and to assess the contrast between dark and light modes.


RE-USABLE COMPONENT
If you have a card images navbar footer or any other element that you use repeatedly you must make it a component as this makes it easier to maintain them by changing colors content or other properties and be sure to create it with a fully stacked layout. For me if I use a card or any other element more than three times I turn it into a component to streamline updates and ensure consistency.
PROPER NAMED LAYER
I always name every layer such as header section image line and more as this makes it easier for me to maintain them and it also benefits teamwork especially with developers.
PROPER NAMED LAYER
I always name every layer such as header section image line and more as this makes it easier for me to maintain them and it also benefits teamwork especially with developers.
PROPER NAMED LAYER
I always name every layer such as header section image line and more as this makes it easier for me to maintain them and it also benefits teamwork especially with developers.
TAG FOR EVERY LAYER
To boost SEO Search Engine Optimization I always assign tags to every layer such as header footer navbar images and more which helps Google recognize my site effectively.
TAG FOR EVERY LAYER
To boost SEO Search Engine Optimization I always assign tags to every layer such as header footer navbar images and more which helps Google recognize my site effectively.
TAG FOR EVERY LAYER
To boost SEO Search Engine Optimization I always assign tags to every layer such as header footer navbar images and more which helps Google recognize my site effectively.
ALT TEXT FOR IMAGES
An additional way to boost SEO Search Engine Optimization is to use figure tags for images and add alt text to every image with a maximum of 125 characters so Google can better identify the pictures.
ALT TEXT FOR IMAGES
An additional way to boost SEO Search Engine Optimization is to use figure tags for images and add alt text to every image with a maximum of 125 characters so Google can better identify the pictures.
ALT TEXT FOR IMAGES
An additional way to boost SEO Search Engine Optimization is to use figure tags for images and add alt text to every image with a maximum of 125 characters so Google can better identify the pictures.

CONTENT MANAGEMENT SYSTEM
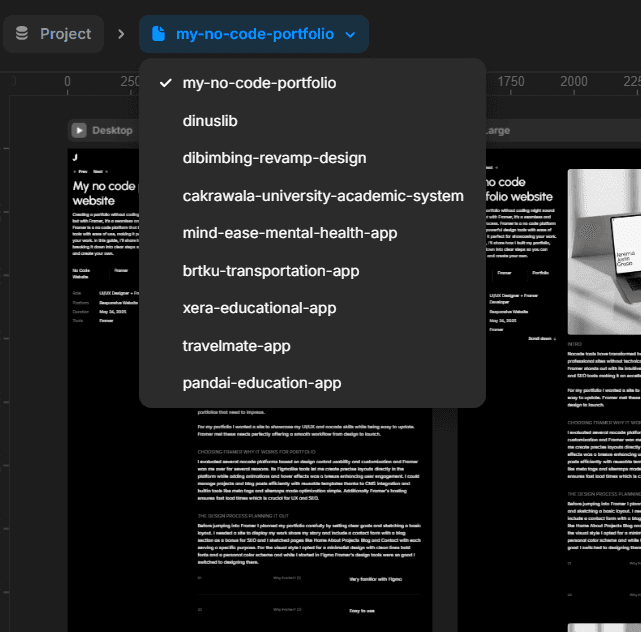
For every project that shares the same layout pattern or design style such as project details, blogs, articles and more I always use CMS to manage all the content easily. We create one page as a template that we can reuse for other projects or blogs and CMS is very helpful to me since I don’t have to design a new design each time and all I need to do is input the content into CMS fields like text, images, and more.
CONTENT MANAGEMENT SYSTEM
For every project that shares the same layout pattern or design style such as project details, blogs, articles and more I always use CMS to manage all the content easily. We create one page as a template that we can reuse for other projects or blogs and CMS is very helpful to me since I don’t have to design a new design each time and all I need to do is input the content into CMS fields like text, images, and more.
HOW TO SETUP CMS
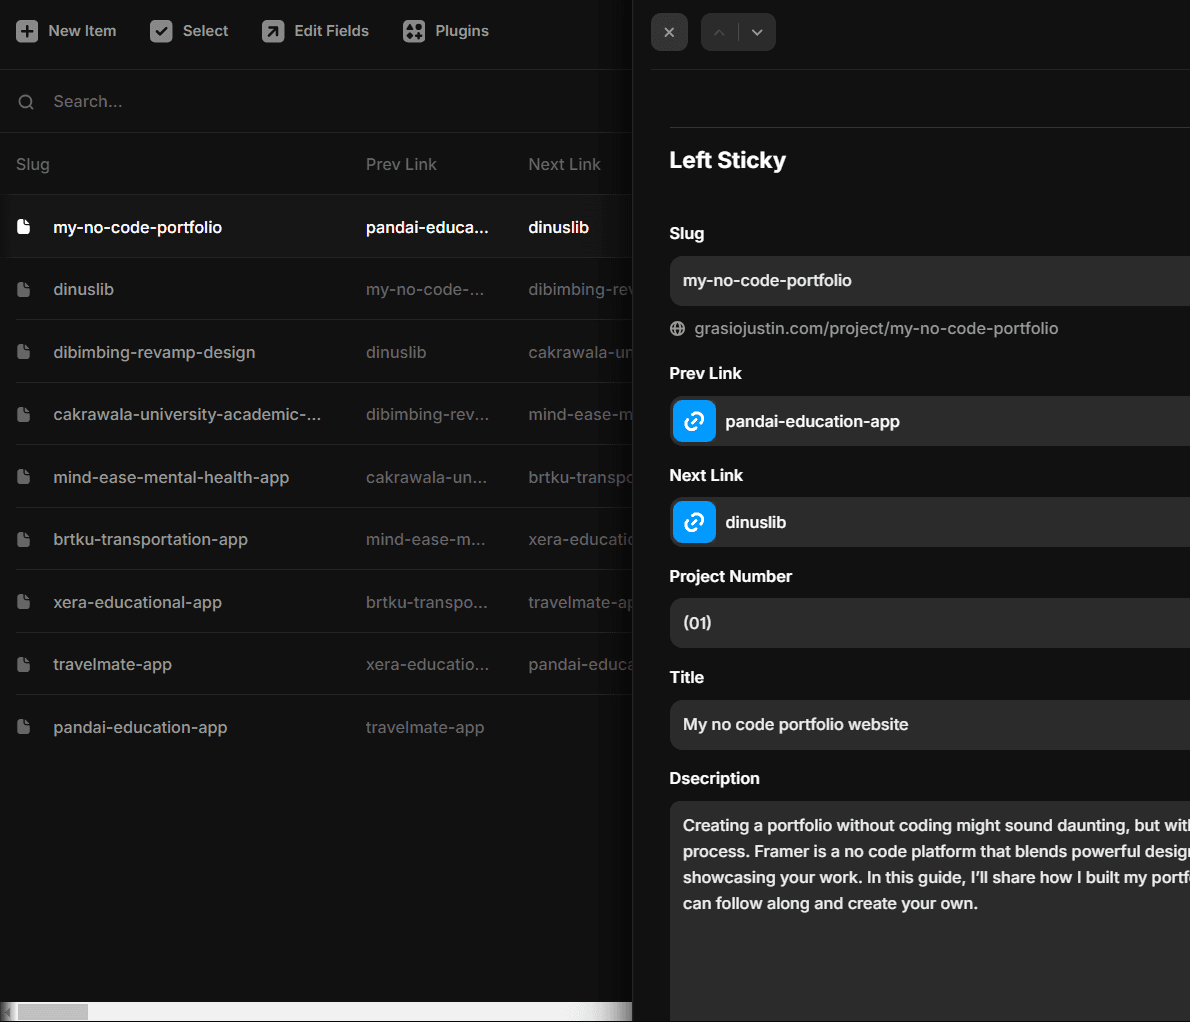
I always design first so I sketch ideas during my brainstorming to determine the content I will include and after that I consider future possibilities for every piece of content I create because I want highly flexible CMS pages that are not overly rigid. For example as you can see in my project details some of them have different content layouts like the images where some have one image and others have two to four images and the titles and descriptions also vary with some having one title and one description while others have two to four. I must anticipate other potential changes that could affect my design details in the CMS.
HOW TO SETUP CMS
I always design first so I sketch ideas during my brainstorming to determine the content I will include and after that I consider future possibilities for every piece of content I create because I want highly flexible CMS pages that are not overly rigid. For example as you can see in my project details some of them have different content layouts like the images where some have one image and others have two to four images and the titles and descriptions also vary with some having one title and one description while others have two to four. I must anticipate other potential changes that could affect my design details in the CMS.
HOW TO SETUP FLEXIBLE CMS CONTENT
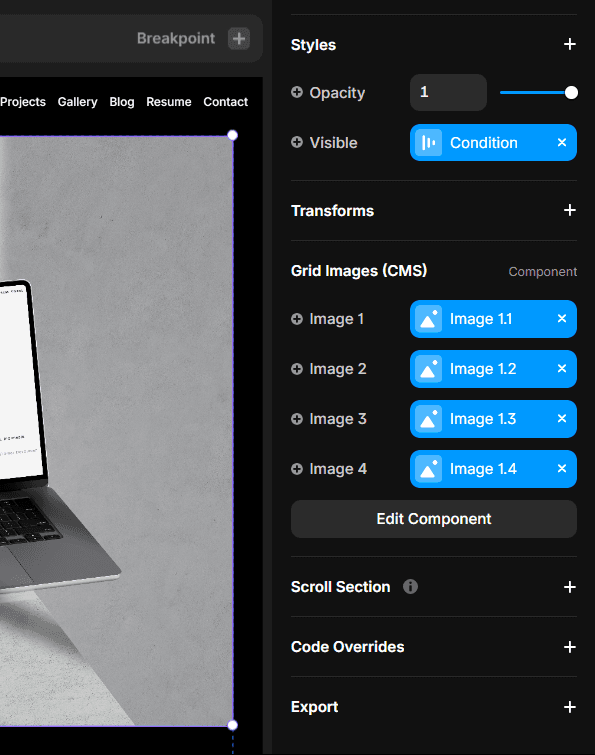
To achieve this I ensure all content that might appear in my CMS design is accounted for and then I create the logic to make them flexible. For example if I set up four images in my CMS field but only have one image to add I design the logic so that if I add just one image it will fill the gap. Another example is for content visibility where if I don’t provide a title for my content the content won’t appear because I set the logic to hide the content if the title is blank. I am make this logic adjustments to all of my CMS property to enhance the flexibility of my CMS design.
HOW TO SETUP FLEXIBLE CMS CONTENT
To achieve this I ensure all content that might appear in my CMS design is accounted for and then I create the logic to make them flexible. For example if I set up four images in my CMS field but only have one image to add I design the logic so that if I add just one image it will fill the gap. Another example is for content visibility where if I don’t provide a title for my content the content won’t appear because I set the logic to hide the content if the title is blank. I am make this logic adjustments to all of my CMS property to enhance the flexibility of my CMS design.
CMS RELATIONSHIP
Every project detail in the CMS, shares the same relationship so for example if you have five projects built in the CMS and you make changes to the first project like adding new images those images you just added will also appear in the other projects built in the CMS. So this is very helpful because we just like create template that will share the same property to the others.

PUBLISH THE SITE, FREE!!!
After reviewing the site I can click the publish button to make my site live so others can see my website and Framer provides a free live website but in the free plan you can’t customize your domain and are limited to a few options like yoursite.framer.website or yoursite.framer.ai. You can upgrade your plan to enhance your website by adding it to Google Analytics and Search Console to boost your SEO and you can also customize your domain to anything you want such as .com .id .me and more. Framer offers several plans based on your needs from personal to business with a variety of features.
REVIEW THE SITE
Framer offers site preview features so before publishing your site you can review it first to ensure all content has a good layout animation structure images and more.
REVIEW THE SITE
Framer offers site preview features so before publishing your site you can review it first to ensure all content has a good layout animation structure images and more.
REVIEW THE SITE
Framer offers site preview features so before publishing your site you can review it first to ensure all content has a good layout animation structure images and more.
PAGE SPEED INSGHT
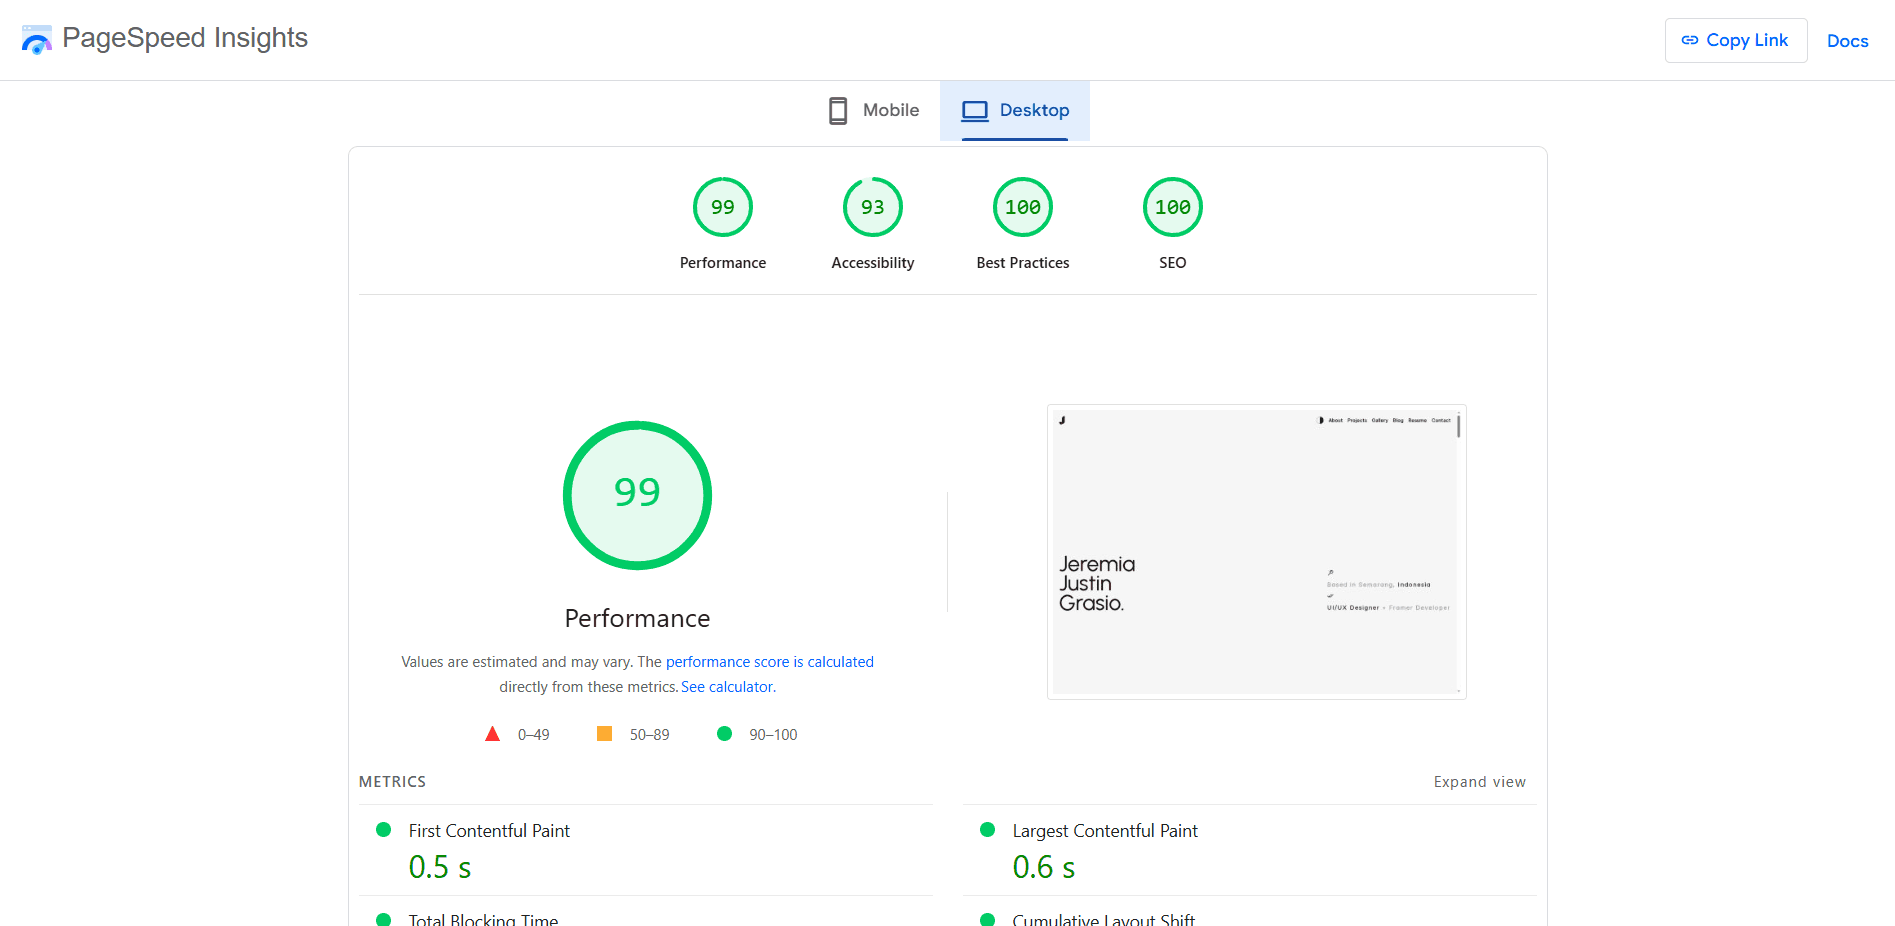
Before publishing my site, I always test its performance using PageSpeed Insights to evaluate metrics like speed, accessibility, best practices, and SEO. Based on the analysis from PageSpeed Insights for grasiojustin.com, I optimize elements such as image loading, server response time, and mobile responsiveness to ensure a fast, user friendly, and SEO optimized website.
PAGE SPEED INSGHT
Before publishing my site, I always test its performance using PageSpeed Insights to evaluate metrics like speed, accessibility, best practices, and SEO. Based on the analysis from PageSpeed Insights for grasiojustin.com, I optimize elements such as image loading, server response time, and mobile responsiveness to ensure a fast, user friendly, and SEO optimized website.
Home Page
Project Details
Gallery
Blog Details

About
Home Page
Home Page
Project Details
Gallery
Blog Details
About
Home Page
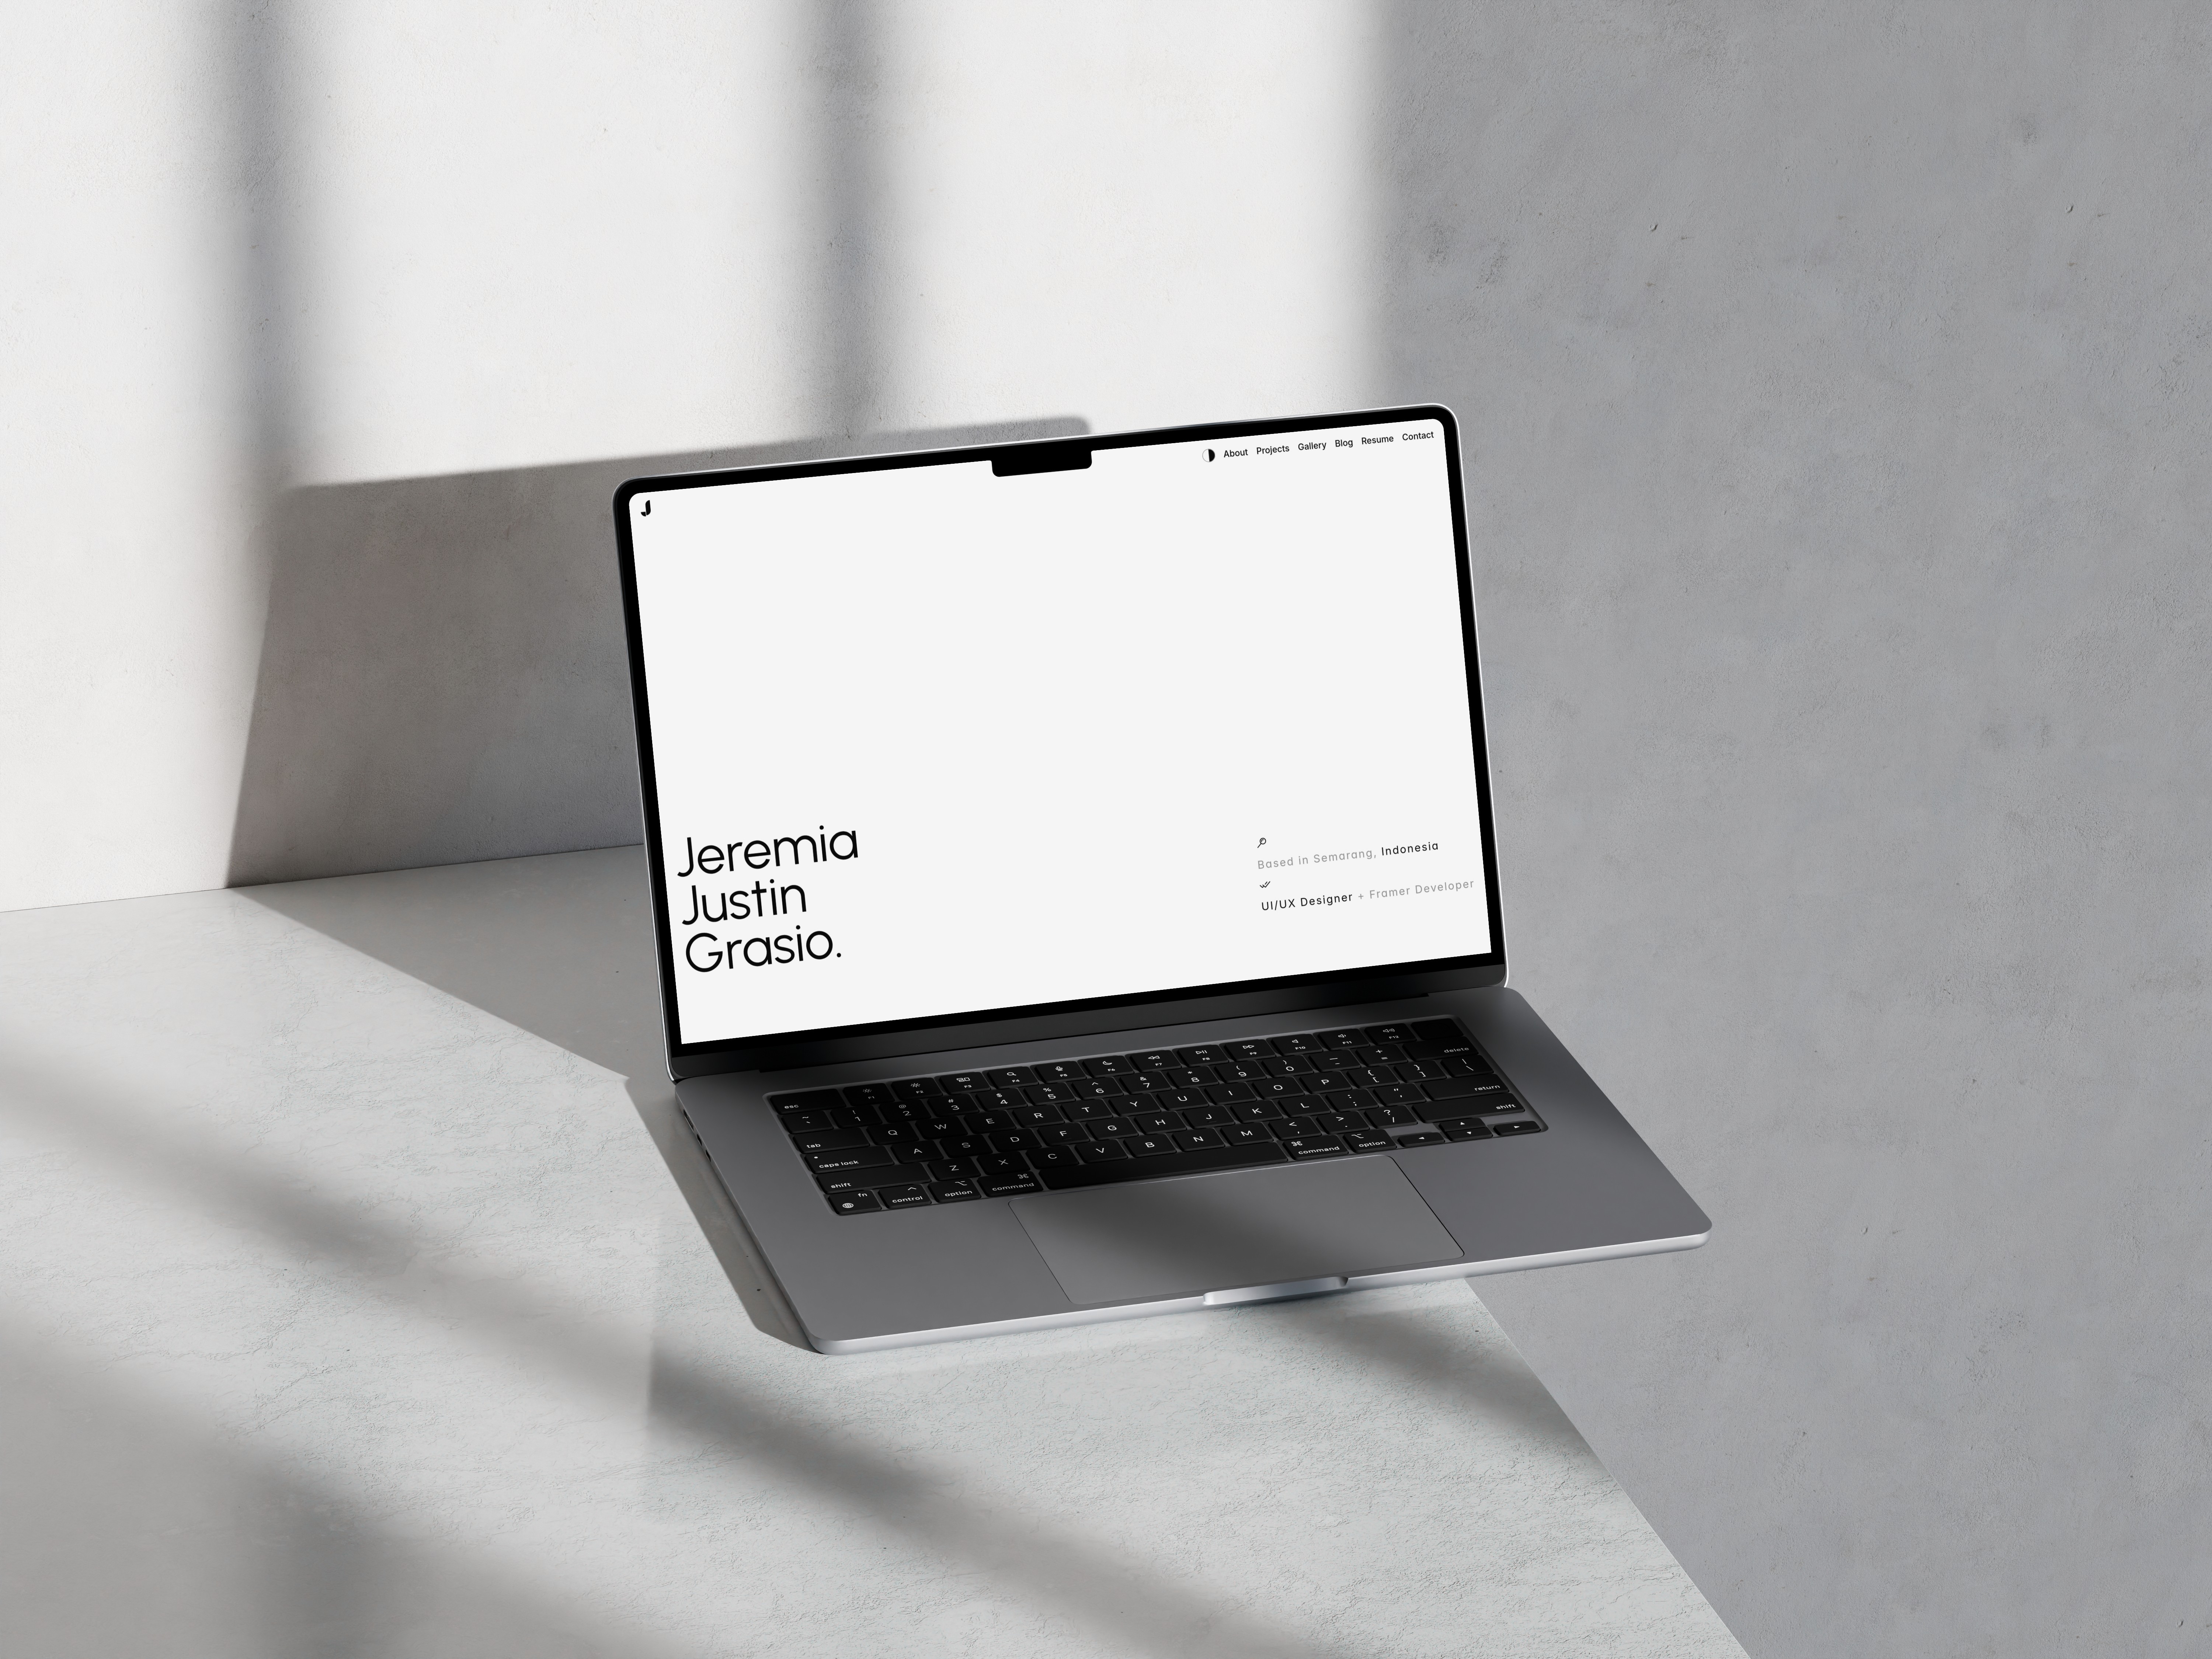
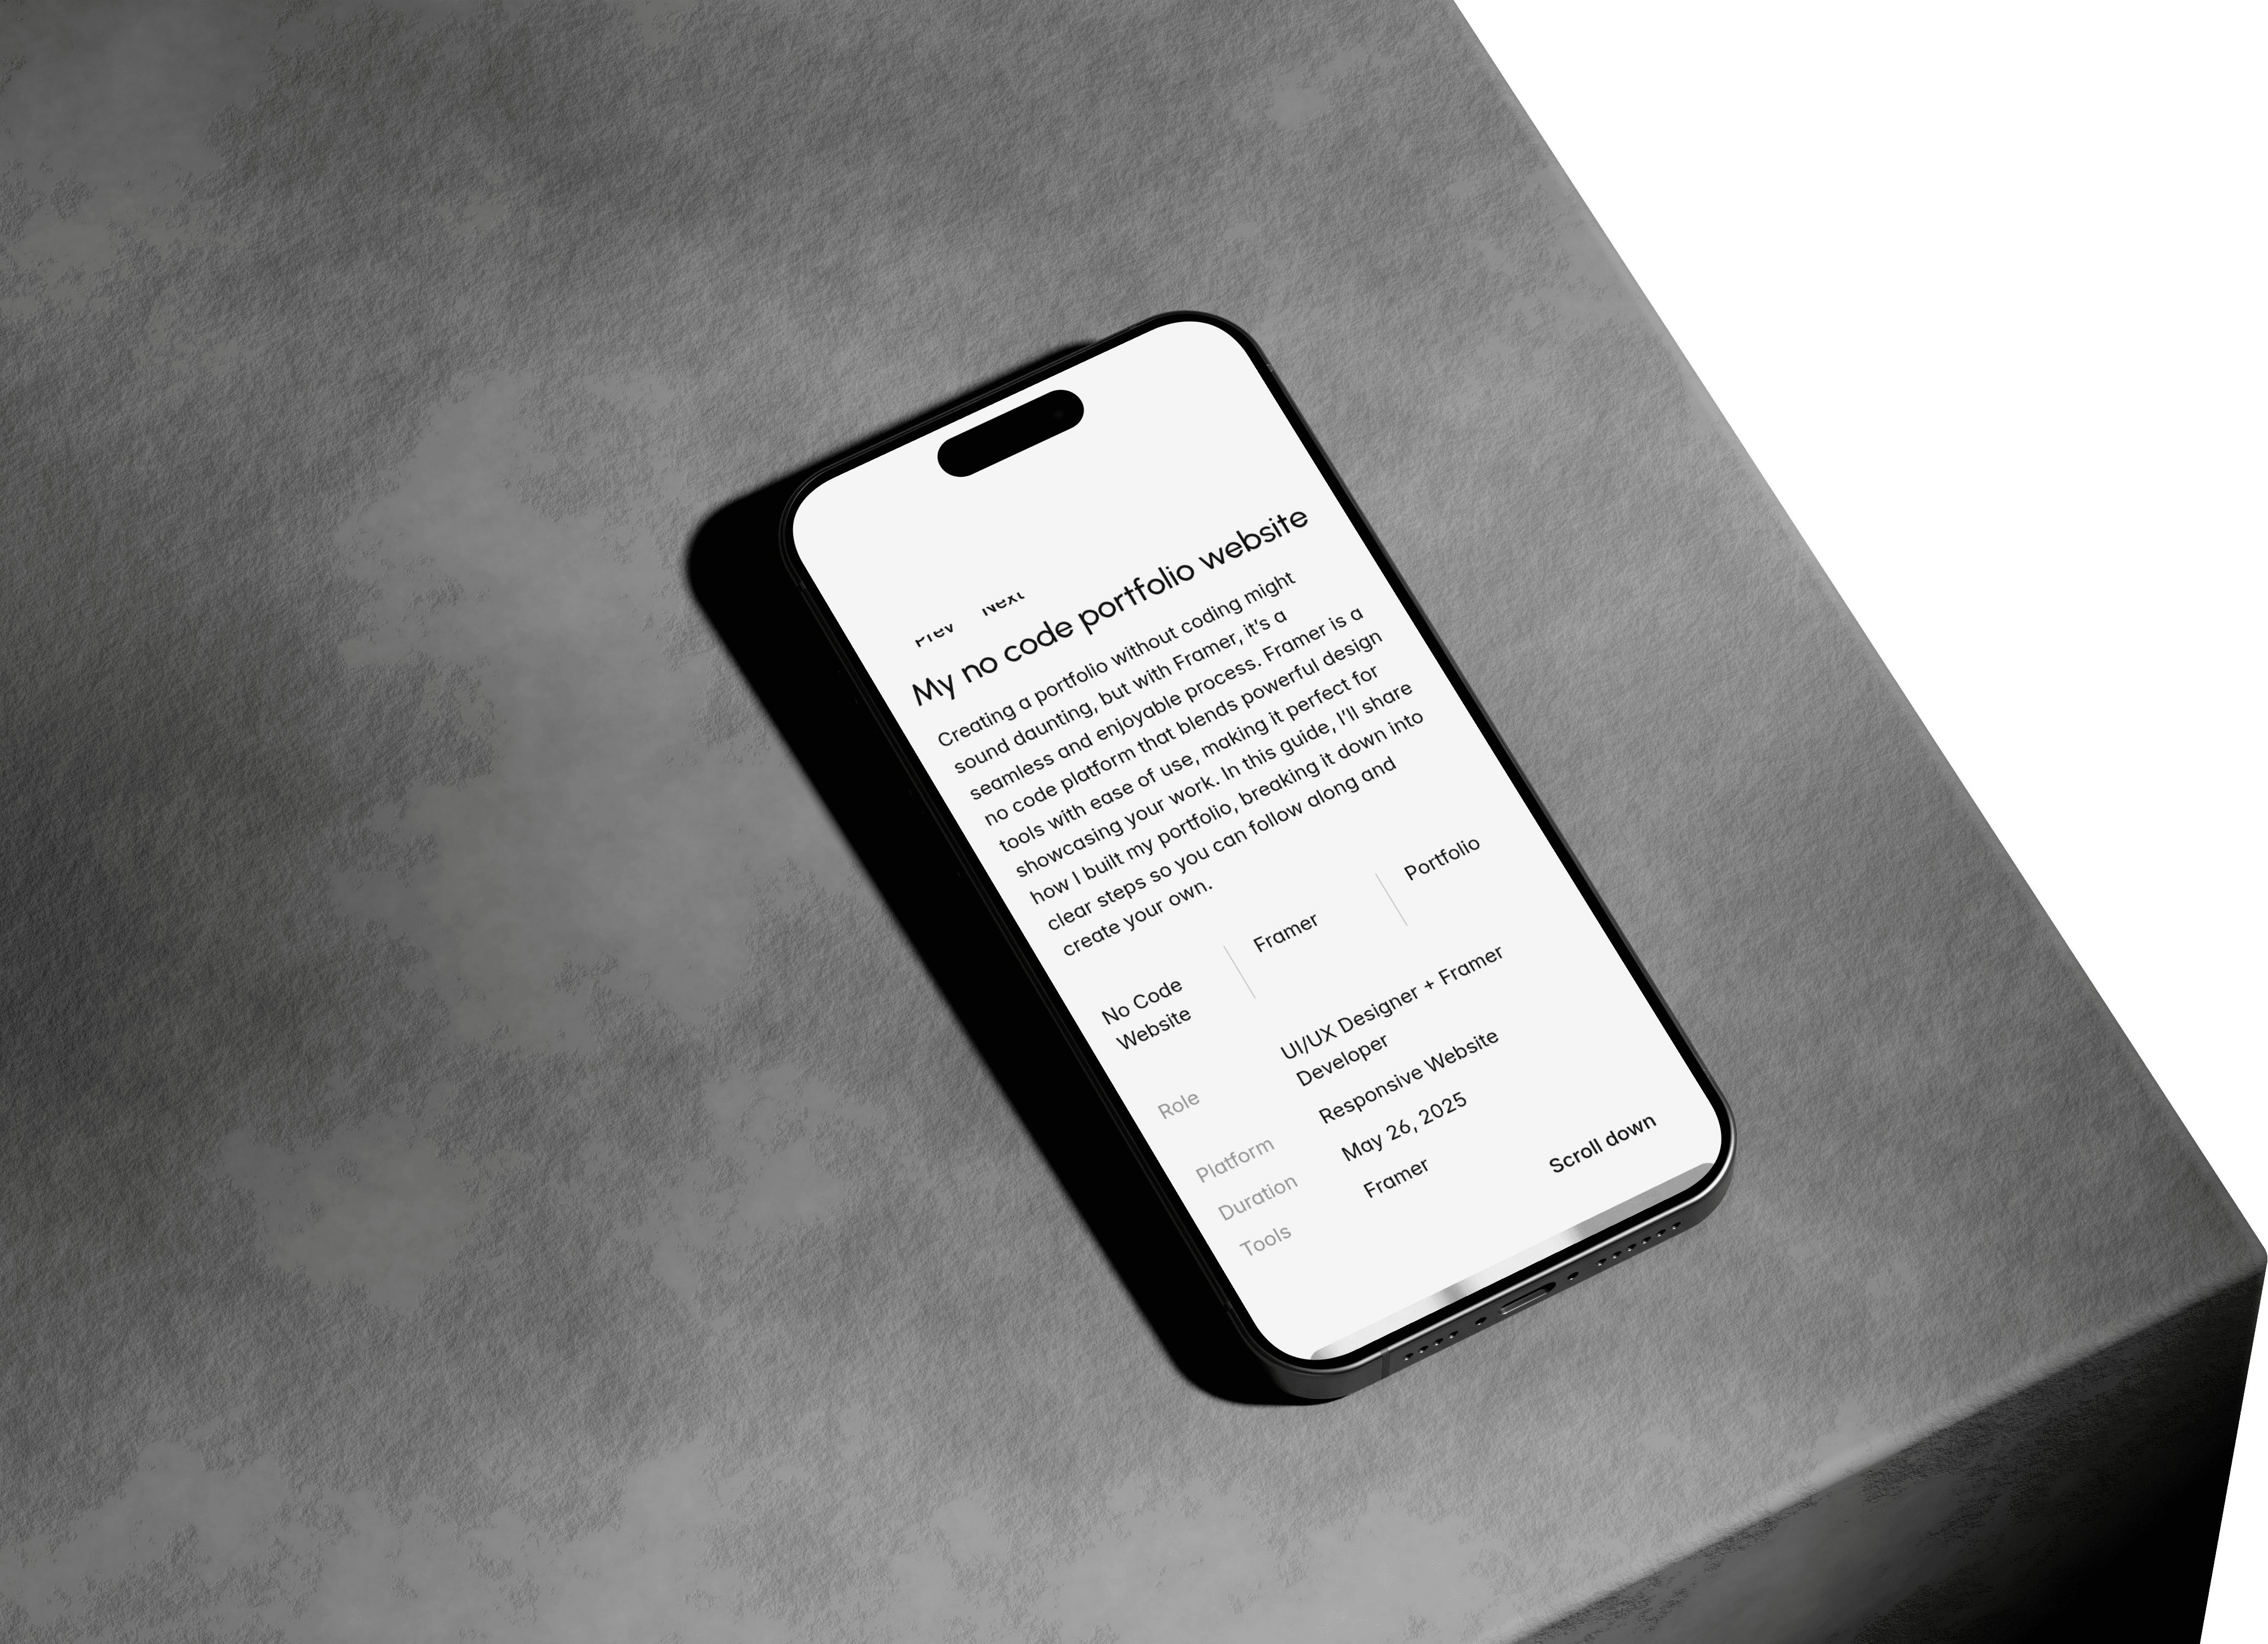
My no code portfolio website
Building a portfolio without coding can seem challenging, but Framer makes it easy and fun. This no code platform combines powerful design tools with user friendliness, ideal for showcasing your work. Here is a concise guide how i create my portfolio
No Code Website
Framer
Portfolio
Role
UI/UX Designer + Framer Developer
Platform
Responsive Website
Duration
May 26, 2025
Tools
Framer
Grasio Justin ⋅
UI/UX Designer ⋅
Framer Developer ⋅
Grasio Justin ⋅
UI/UX Designer ⋅
Framer Developer ⋅
Grasio Justin ⋅
UI/UX Designer ⋅
Framer Developer ⋅